
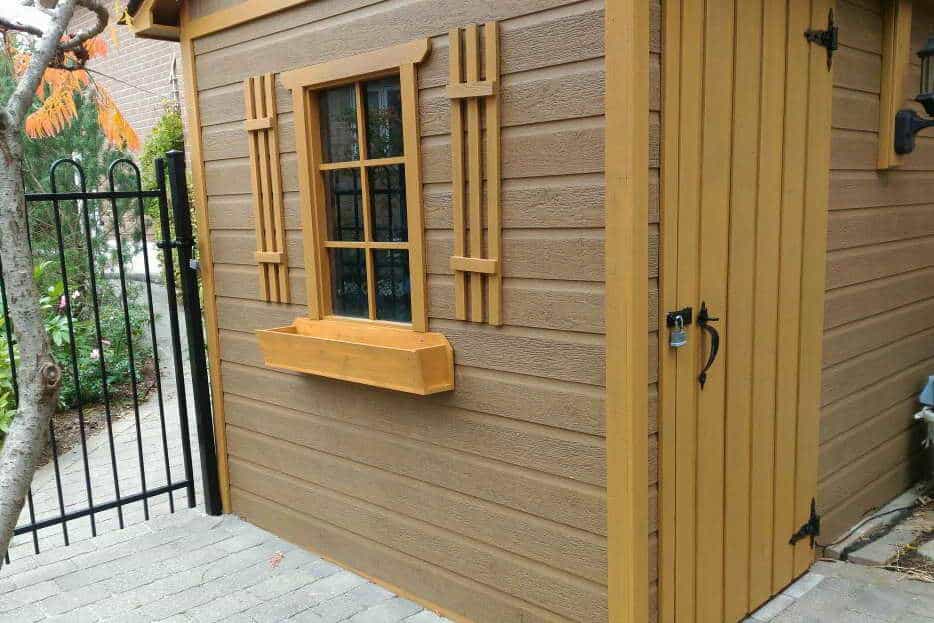
After I had fixed the shed foundation, and stained the trim and door, the window box was crying out for attention. Thirteen years of sitting with damp soil in it will do that. So I decided to make one from scratch, which wouldn’t be that hard – screw and glue five bits of board, right?
But I decided I should do what all the “real” woodworkers do on YouTube – start with a hunk of wood and carve the boards out of that first, rather than go out and buy boards of the right width and thickness and just cut them to length. Hey, I had all the right tools.
When our next door neighbour had their wooden deck demolished, they let me pull out some of the 2×6 cedar deck boards, and I thought I’d create 1/2″ thick boards from that.
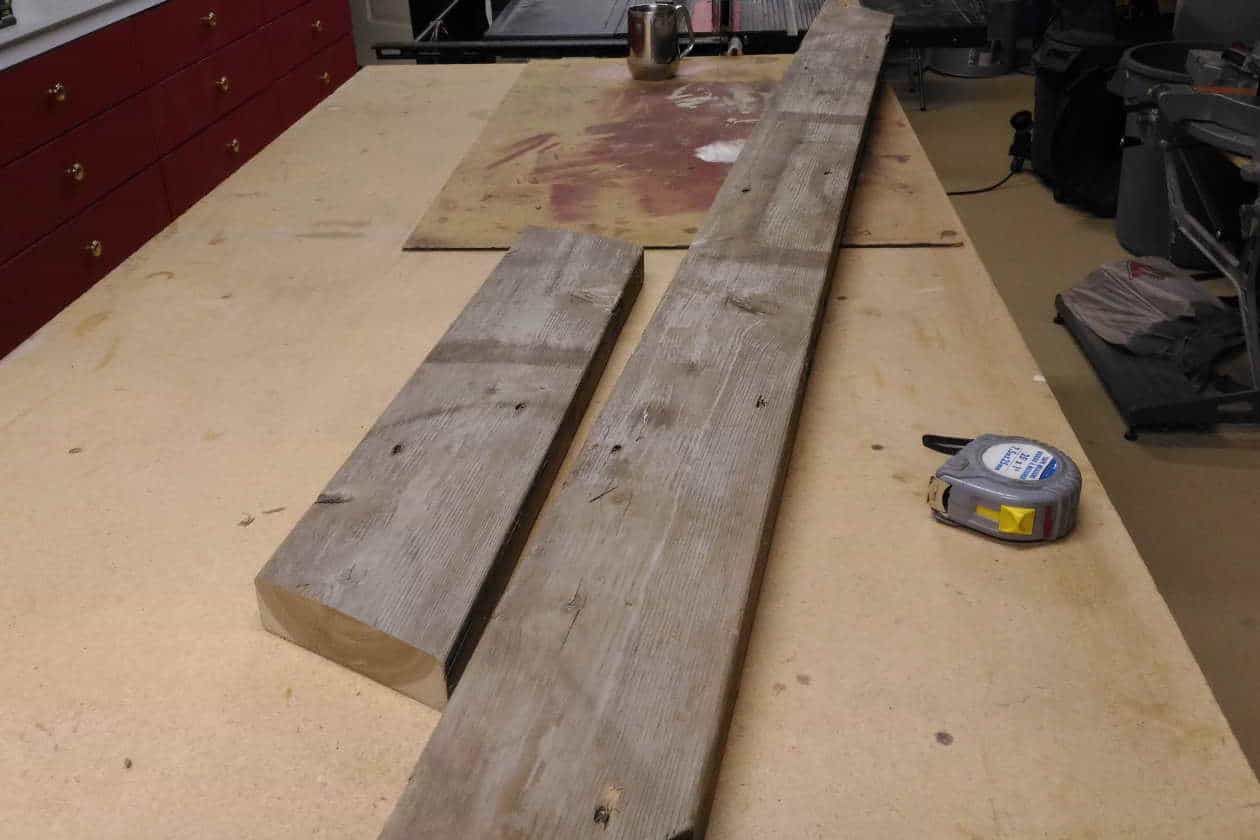
I started by running the boards through the table saw on edge, from each side, so there would be a clean cut except for the centre where the blade didn’t reach. Then I changed the blade on the bandsaw to my widest blade (for a straighter cut) and went to run the board through. Clunk. That was the sound of the board hitting the upper blade guard – apparently my bandsaw resaw capacity is less than 5.5″. So I tried a handsaw. Huh! For some reason I had a crosscut handsaw, not a rip. I doubt that I knew what the difference was when I got it, it probably just looked like a nice saw! Anyway it would have taken 4.3 days to make the cut. After evaluating several other possibilities, I settled on using a reciprocating saw with an 8″ blade. (This is the kind of saw one uses for demolition work – it’s not a precision instrument.) After cutting down six feet of board I was shaking all over, and not from excitement. I had gone off track a few times, but the next step would take care of that.
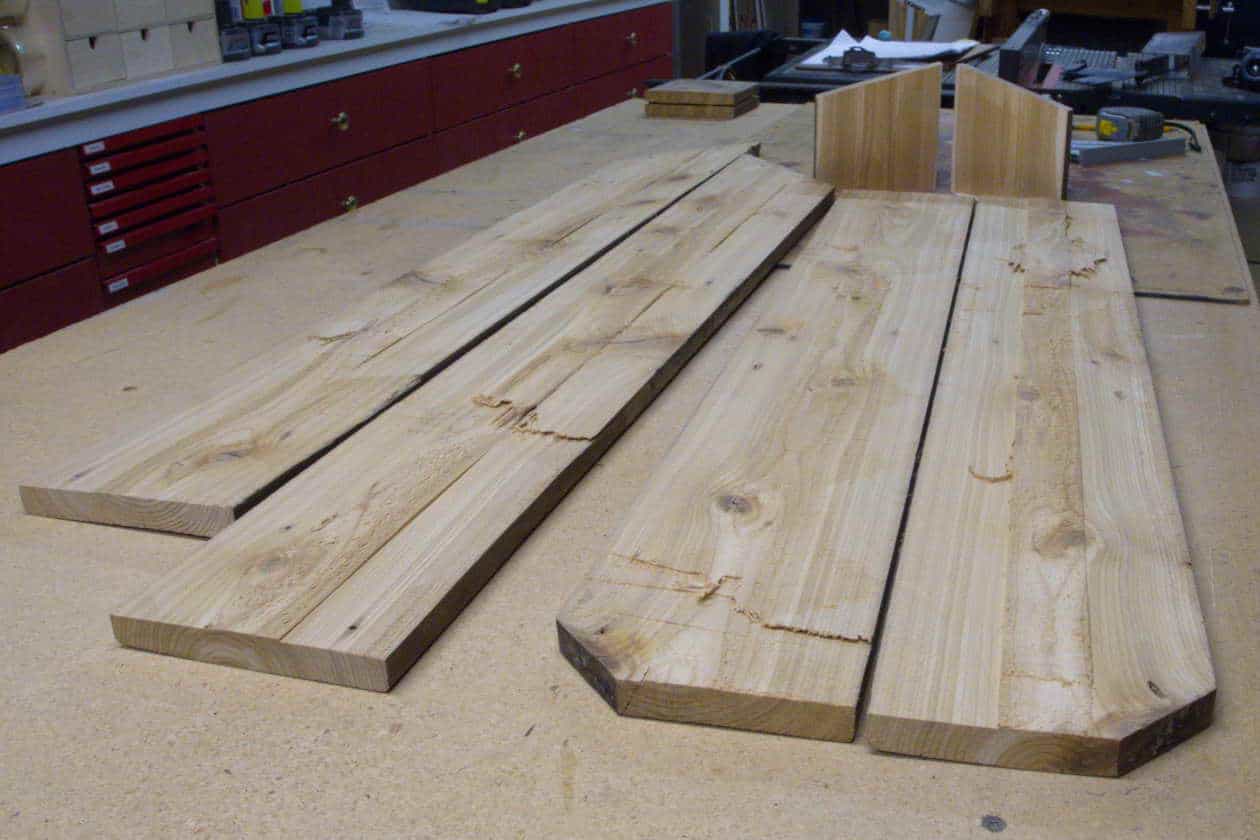
So I set up the jointer and planer. I got the “good” side flat on the jointer, and moved on to the planer. After about two passes on the first half, the planer started bogging down as soon as I lowered the cutting head. The board was moving through, but stopped as soon as the head engaged. It took me far too long to find out that the drive belt had broken. Melted, in fact. Things were not looking up. I tried hand planing, and ended up back on the jointer, which was faster, but didn’t leave the boards with parallel faces. I stopped before I had turned the entire board into shavings. Here’s how they looked at one point – the centre portion is still visible, as are the places where the demo blade wandered off course.
I moved on to putting plugs into some of the nail holes, which would have gone better if I’d used a drill press instead of hand drilling, but still looked OK after the plug was sanded down.

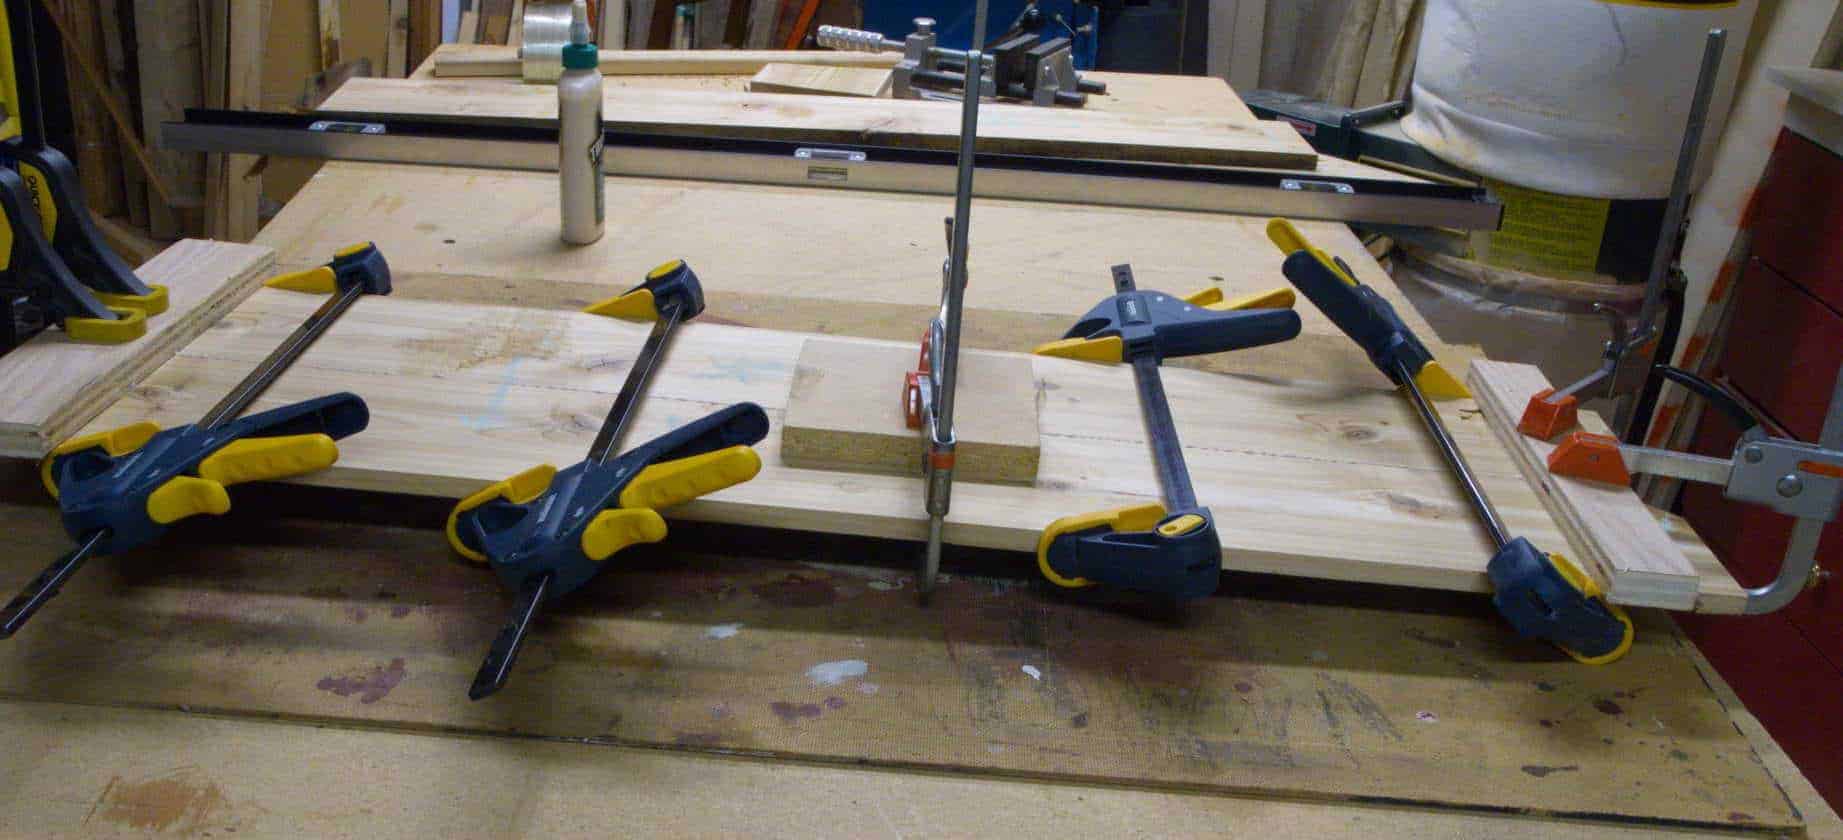
I had decided to make the back board wider than the other ones, so the box would hang down from the window by an inch or two, which would keep the soil and water further from the horizontal part of the shed window, and should keep it a bit drier. I suspect the original design didn’t do that so the builders could make it all from 1×6 material. Anyway, I was going to join two boards edge to edge, which would have been a lot simpler had they all been run through a planer to be exactly the same thickness. Or even if I had joined them and could have then run the result through the planer. Instead, I had to devise a way to keep the front (good) faces aligned, and so I came up with this – the blocks on top had packing tape stuck where the glue line was, or there would have been a real mess with the blocks attached permanently to the work piece.
That worked quite well, and after sanding the result was decent, and I could cut the back to width and move on to the point I would have been at had I gone out to purchase 1×6 boards in the first place. Well, almost. I had forgotten that while the back looked fine from the front, from the sides, one could see the step in width. So I routed out about an inch back from each end on the thicker part so the thickness change was concealed.
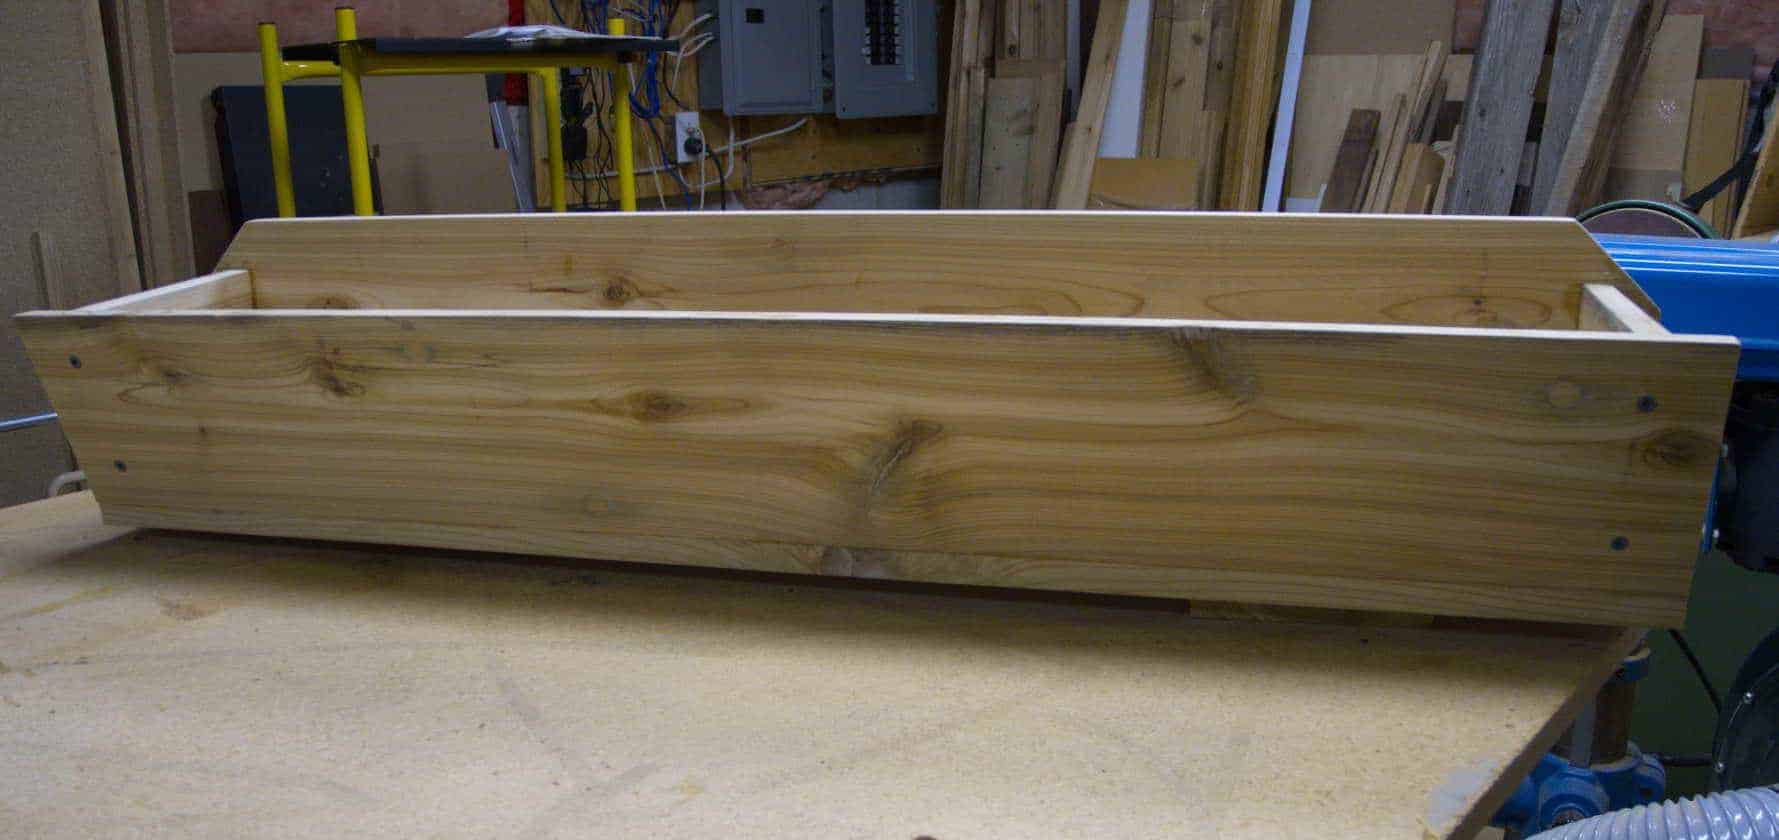
And after staining and installing it, I can finally say the 2017 shed reno is finished!
Which is more than I can say for the planer. I was lucky enough to find a replacement belt (the planer is probably 20 years old) but the manual doesn’t say how to replace it. I did find one source that documents the process, and apparently it involves stripping the thing to a shell, soaking the belt in 180 degree hot water for 15 minutes and invoking several of the ancient gods of woodworking to get it on. Wish me luck. You may see ads for a “planer for sale, as-is, all parts included, just put them together” sometime in the future.

2 responses to “Real proper woodworking attempt”
Great job David I have done a lot of work with cedar fence boards to be used to make feature walls. I use my table saw to resaw them. Finally made a jig which enclosed the wood for four feet (over the table saw). You can imagine the cedar dust that I got for resawing around 200 boards. Now I have a shopsmith 510 with a band saw and it takes a lot less of the board away. So I am impressed with what you did with all the problems you ran into.
I was always fascinated by the Shopsmith idea, but after I acquired the major individual tools there was no point. I really need to refurbish my Craftsman radial arm saw circa 1971. It never got reassembled after the last move, and is looking very sad in a corner.